
Notes on setting up ReFS on Windows
This is a runbook on setting up redundant storage on Windows.
Setting up storage pool
You can create the storage pool from your drives using the ‘Manage Storage Spaces’ applet in the Windows Control Panel. The drives must be uninitialized. To create a resilient space, you will need at least two drives in the pool, and three or more drives for parity-based resilience. Note: you can always add more drives to the pool later. Read a description of resilience types in this Microsoft article (it talks about servers, but the same applies to disks in local storage pools).
Creating a storage space
This will create an unformatted resilient (3 columns, e.g. 2 data + 1 parity) 80TB storage space, which does not require the whole capacity to be immediately available:
New-VirtualDisk -StoragePoolFriendlyName "YourPool" -ProvisioningType Thin -Interleave 32KB -FriendlyName Resilient -Size 80TB -ResiliencySettingName Parity -NumberOfColumns 3
NOTE: Pay attention to the -Interleave parameter. As described in this article,
it is important that when you format the disk in the next step, your file system uses
blocks whose size is evenly divisible by the interleave size.
This command will initialize the disk and assign it a drive letter:
Get-VirtualDisk -FriendlyName Resilient | Get-Disk | Initialize-Disk -PassThru | New-Partition -UseMaximumSize -AssignDriveLetter
Now you can format it to ReFS:
Format-Volume -DriveLetter XXX -FileSystem ReFS -AllocationUnitSize (32*1024*YYY) -SetIntegrityStreams $True
Integrity checking
You must enable periodic integrity checks on your ReFS volumes. Not doing so means when you actually try accessing data many years later it might turn out to be corrupted on all replicas, and will not be recoverable anymore. Periodic integrity checks ensure all the replicas are correct, and if one replica is corrupted, scanner will use the other replicas to repair the data. So the data could only be lost if all replicas get corrupted between the integrity scans, which is much less likely.
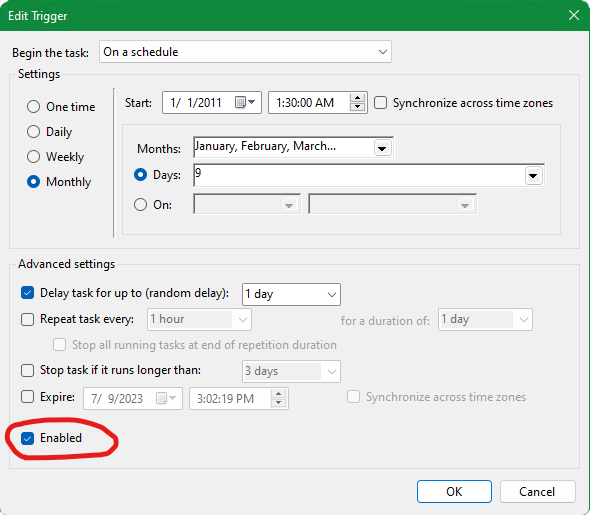
To enable periodic checks, open Task Scheduler and find the scan tasks under
Microsoft\Windows\Data Integrity Scan. Then
- Pick the one with “Multiple triggers defined”
- Adjust the trigger to the desired frequency/schedule
- MOST IMPORTANT Enable the trigger!
NOTE: There’s a disagreement about the meaning of ReFS integrity checking settings
and no guidance from Microsoft that I could find. File integrity must always be Enabled
for ReFS to be able to detect corruption (it goes to the Event Log), but Enforced state
which is enabled by default will confusingly make partially corrupted files extremely
hard to recover. So until the situation is resolved, I recommend setting Enforced to False.
Encryption
There’s a known issue with internal SATA drives on Windows that show up as ‘Removable’ and could only be used with BitLocker To Go. If you open BitLocker and your storage space is listed under ‘Removable’, you’ll need to follow the steps mentioned later in the same article for each physical drive in your pool (will likely need the Windows 8 and later option). A reboot might be required.
Once you’ve ensured, that your storage space is listed under ‘Fixed data drives’, you can encrypt it.